
How to convert between audio formats?
- Introduction
- Step 1: Download and install Soft4Boost Audio Converter
- Step 2: Run Soft4Boost Audio Converter and add audio tracks for conversion
- Step 3: Set output audio format
- Step 4: Configure output format parameters
- Step 5: Modify audio tags (optional)
- Step 6: Edit audio tracks (optional)
- Step 7: Start the conversion
We have a great variety of multimedia players. The list of existing audio formats is also quite long and it is obvious that your devices are not designed to support them all: say, some of them are supported by your stationary DVD and some – by your portable device. How to play your recorded audio encoded in a format supported by your portable device using a DVD player and vice versa?
Soft4Boost Audio Converter will come in handy to convert between different audio formats– so giving the exact answer to the question above. Follow the steps below and you will see how simple and efficient it is.
Step 1: Download and install Soft4Boost Audio Converter
Click here to download it. After the download is finished, run the S4BAudioConverter.exe file and follow the installation wizard instructions.
Step 2: Run Soft4Boost Audio Converter and add audio tracks for conversion
Run the Soft4Boost Audio Converter executable using the desktop shortcut or the Programs section of the Start menu. Select one of the 3 available options to load audio into the program:
- Press Add File to load one or a number of audio tracks located on your computer hard drive into the program. Press the arrow below the Add File button and select Add Folder to add the audio files from a folder to the program or select the Add Files Preserving Folder Structure option to load the audio files from a folder with some subfolders and preserve its structure;
- Press Grab from CD to grab your personally recorded audio CD inserted in your disc drive and load the grabbed audio tracks for conversion;
- Press Import from Video to import the audio track(s) of a video file into the program.
Step 3: Set output audio format
Select output audio format by pressing the corresponding button on the command bar located at the top of the Soft4Boost Audio Converter main window:
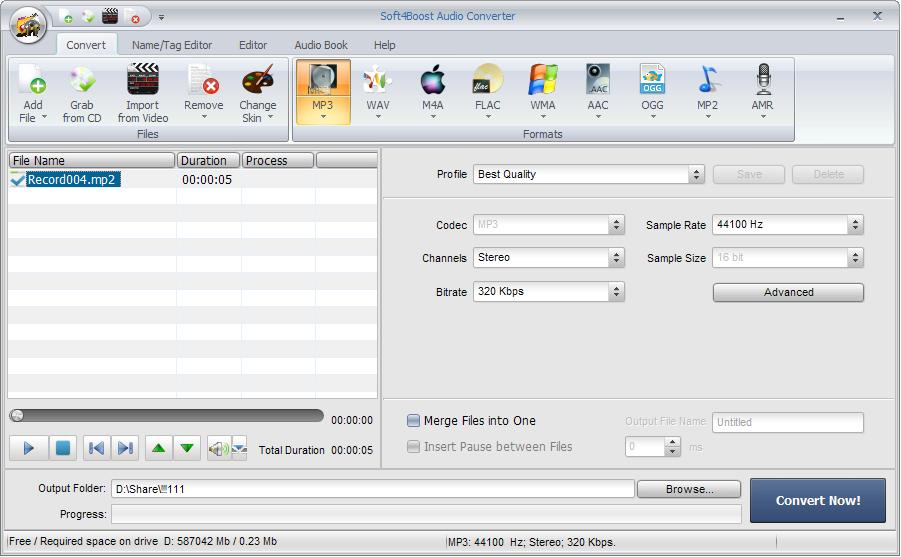
Step 4: Configure output format parameters
Select one of the default conversion profiles in the drop-down list of the Profile field. Profile is a pre-made parameter configuration designed to serve a particular purpose (for example, to create a file of a certain quality or a file for playback on a particular device). We recommend using default profiles if you are new to audio conversion.
If none of the default profiles meets your needs, you can adjust output format settings. All audio format parameters available for editing are listed below the Profile field.
Step 5: Modify audio tags (optional)
Switch to the Name/Tag Editor tab, then press the Tag Info button to display the audio tags available for editing:
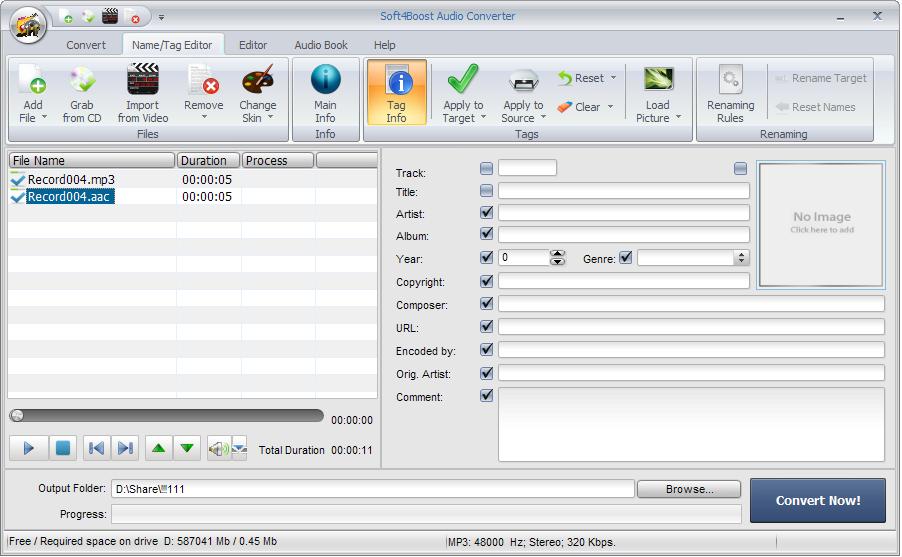
Fill in the tag fields (all fields are optional). Press Apply to Target to save tags to some audio files selected in the conversion list. Press the arrow under the Apply to Target button and select Apply to All Target Files to save the information you entered in the checked audio tag fields to all audio files loaded into the program. Both these options save audio tags to the converted files. Press Apply to Source to save audio tags to original audio file. If you want to save the modified information in the checked tag fields to all original files, press the arrow next to the Apply to Source button and select the Apply to All Source Files option.
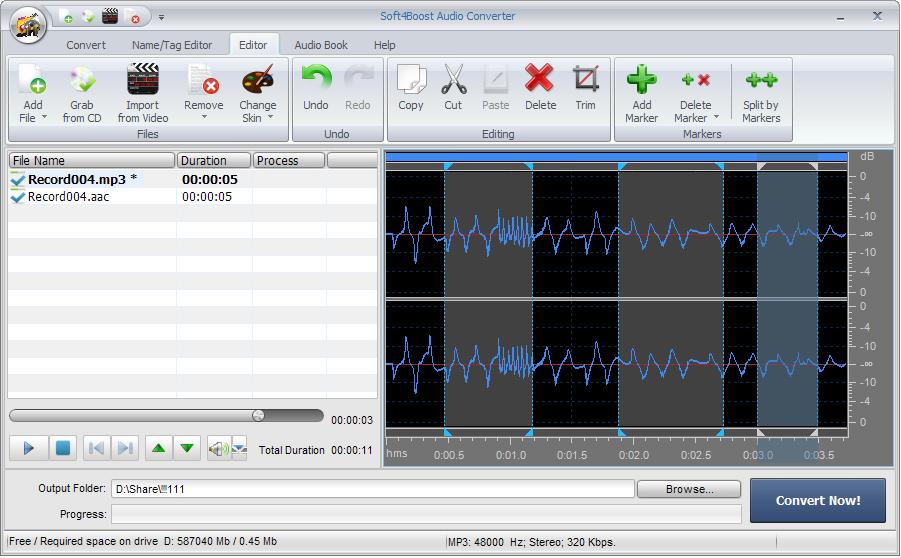
Step 6: Edit audio tracks (optional)
Switch to the Editor tab, next double-click the audio file you wish to edit. It will be visualized in the area on the right:
Now specify where your converted file(s) will be saved. To do that click the Browse button to the right of the Output Folder field.
Finally, click the Convert Now! button and wait till the process is completed. The duration will depend on the number of files you convert, output format settings and your computer capabilities.
Some time later you will be able to check the converted files in the assigned output folder and transfer them to any supported device.