
How to create audio books?
- Introduction
- Step 1: Download and install Soft4Boost Audio Converter
- Step 2: Run Soft4Boost Audio Converter and load your input files
- Step 3: Edit audio files (optional)
- Step 4: Specify your audio book parameters
- Step 5: Create your audio book
There are many reasons why audio books are very popular these days. For example, if you don't have time to read, then you can listen to audio books uploaded to a portable player even while doing something else. Audio books in mp3 format are commonly used and can be listened to on almost every portable device.
Let us suppose that you have recorded yourself reading and want to make your own audio book out of this voice recording. Soft4Boost Audio Converter will help you perform this task.
Step 1: Download and install Soft4Boost Audio Converter
Click here to download it. After the download is finished, run the S4BAudioConverter.exe file and follow the installation wizard instructions.
Step 2: Run Soft4Boost Audio Converter and and load your input files
Run the Soft4Boost Audio Converter executable using the desktop shortcut or the Programs section of the Start menu. Select one of the 3 available options to load audio into the program:
- Press Add File to load one or a number of audio tracks located on your computer hard drive into the program;
- Press Grab from CD to grab your personally recorded audio CD inserted in your disc drive and load the grabbed audio tracks for conversion;
- Press Import from Video to import the audio track(s) of a video file into the program.
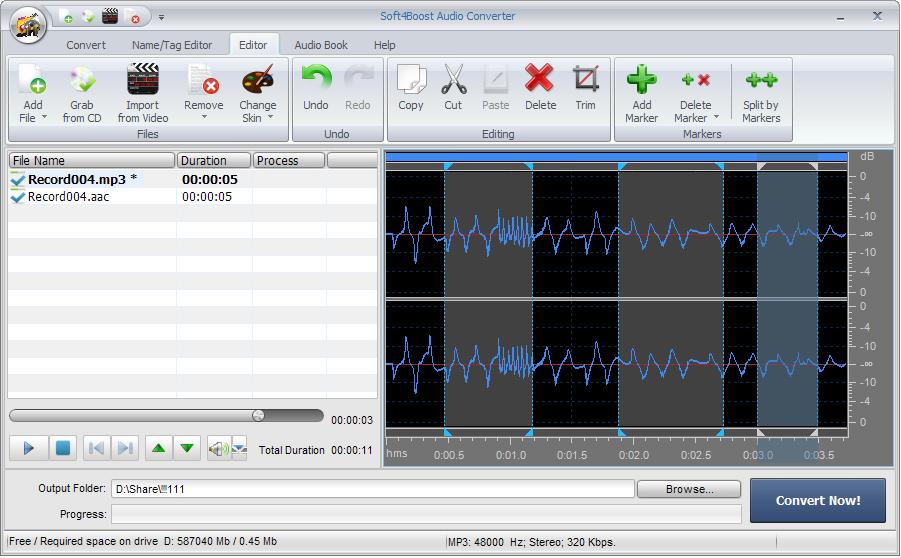
Step 3: Edit audio files (optional)
You can process your input audio prior to creating an audio book if you need to delete some unnecessary parts. Switch to the Editor tab, next double-click the audio file you wish to edit. It will be visualized in the area on the right:
Step 4: Specify your audio book parameters
First of all switch to the Audio Book tab.
If you have loaded several audio files, set the needed track sequence by clicking the file whose position you'd like to change and then pressing the Move up or Move down button below the conversion list.
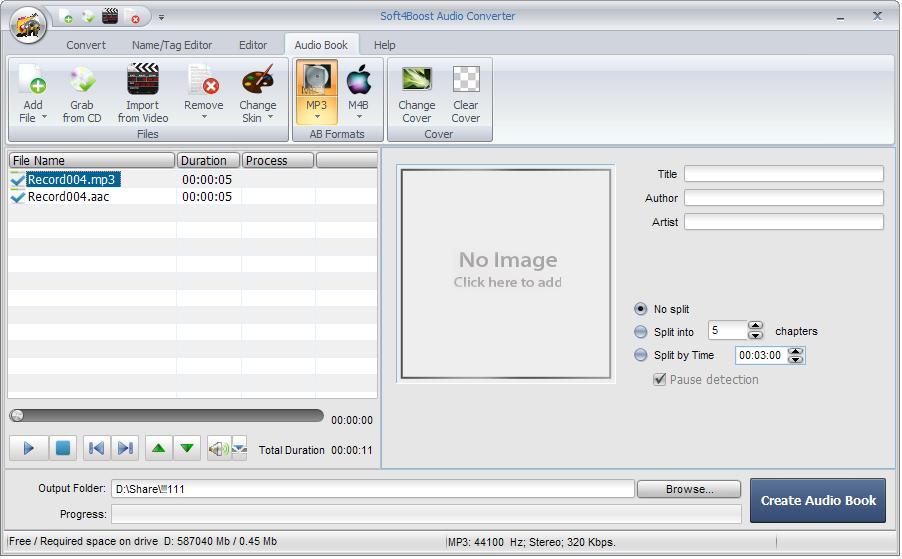
Press the MP3 button of the AB Formats group on the command bar in order to set the output format of your audio book.
Select the splitting mode if you want to split your audio book into a number of chapters. You can choose between these three options:
- No split — if you want to receive a single file;
- Split into ... chapters – if you want your audio to be split into a specified number of equal parts;
- Split by Time – if you want your audio to be split into equal parts of a specified duration.
Use the arrows or the keyboard to input the needed value.
If you select splitting by time or by the number of chapters, then the Pause detection option will be available. If it is checked your audio material will be split into the selected parts according to the moments of silence detected.
Then fill in the fields with the information about the Title of your forthcoming audio book, its Author and Artist reading the text.
To load an image for your audio book cover right-click the Image Area and select the Change Cover option from the menu. In the opened Windows Explorer window select the needed picture and press the Open button. To delete or replace the cover use the right-click menu options or the corresponding buttons of the Cover group on the command bar.
Step 5: Create your audio book
Click the Browse... button next to the Output Folder field and set a location on your computer HDD.
Finally, press the Create Audio Book button situated in the right bottom corner of the program window to start creating your audio book. You will see the overall progress on the progress bar in the output audio area.
In the output folder you will find a subfolder that contains an mp3 file (or several files depending on your choice of file splitting) and an m3u playlist which allows you to navigate through chapters during the playback on a player.
Now you can leave your created audio book on your computer HDD or upload it to your portable player and enjoy listening to it.