
How to split a home video DVD into chapters?
- Introduction
- Step 1: Download and install Soft4Boost Video Converter
- Step 2: Run Soft4Boost Video Converter and select your input video file
- Step 3: Set up the output parameterss
- Step 4: Set up a proper video output file path
- Step 5: Start the edit mode
- Step 6: Add chapters automatically
- Step 7: Add chapters manually
- Step 8: Choose a DVD menu template
Soft4Boost Video Converter enables you to burn a home DVD video to playback in your home DVD player. While creating a DVD you might need to split it into chapters for more convenience. Dividing into chapters lets you easily find the necessary video file or part of the video. First you select the input file or several files. Then you set chapters, which will allow you to navigate through your DVD quickly and easily.
Step 1: Download and install Soft4Boost Video Converter
Click here to download it. After the download is finished, run the S4BVideoConverter.exe file and follow the installation wizard instructions.
Step 2: Run Soft4Boost Video Converter and select your input video file
First of all run Soft4Boost Video Converter. To do that find the corresponding program icon on your desktop and double-click it. If you unchecked the Create desktop icon box during the installation, you can run the program from the Start menu. Please follow Start > All Programs > Soft4Boost > Video Converter.
To select a video you would like to convert hit the Browse... button next to the Input File Name field. In the opened Windows Explorer window browse for the necessary video file.
Note: when your input is a DVD disc, you will need to select the path to your source file: X:\Video_TS\Video_TS.IFO. "X" stands for your DVD-ROM or the hard disk drive folder where your DVD is stored. Please see the online help section to find more on how to convert your home DVDs to other video formats.
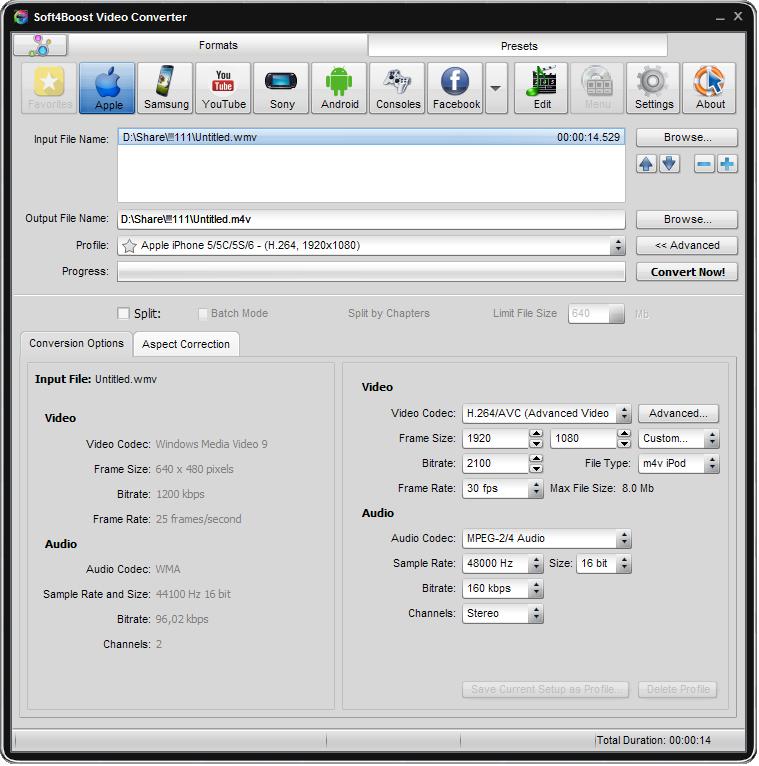
Step 3: Set up the output parameters
Click the To DVD button on the Formats tab of the Main Toolbar to select the DVD video creating mode. In the list of video disc types (Profile) select one of the preset profiles.
You can edit the list of files to burn. By clicking (+/-) buttons you can add or remove files from the list. Using the Arrows you can change the sequence of files.
Step 4: Set up a proper video output file path
Click the Browse... button next to the Output File Name field and select a location on your HDD for the output video file.
Note: when you select a location for your output video file, you should save the file to your personal computer HDD.
Now hit the Edit button to start the edit mode.
Step 6: Add chapters automatically
In the opened Edit Input File(s) window click the Chapters central button. If you are burning several files to a DVD, click the Auto Set Chapters button on the Timeline Toolbar and choose one of the following options:
- At the Beginning of Each Clip - if you want chapters to be placed at the beginning of each video;
- At a Time Interval - if you want to assign an interval at which the chapters will be added over a duration of all the added videos;
- As in Input File(s) - if you want chapters to be set as in your input file.
Make left mouse click on the timeline where a chapter should start. Then press F8 on the keyboard or click the Add Chapter button or right-click and select the appropriate option from the express menu to save a new chapter. Navigate the timeline this way and add as many chapters, as you wish. To set chapters more precisely use the Zoom slider to zoom in/out the timeline.
Step 8: Choose a DVD menu template
After all the chapters are added click the Disc Menu central button to start editing your DVD Menu.
Select one of the Disc Menu Styles by double-clicking it or selecting the Apply Menu Style option from the right-click menu. Switch between the Main Page and the Chapters page in the Preview Area. To assign your own background pictures left-click the Working Areas (if they are available for the selected menu style) at the bottom of the Edit Input File(s) window, select the desired image or video file in the opened window and press the Open button.
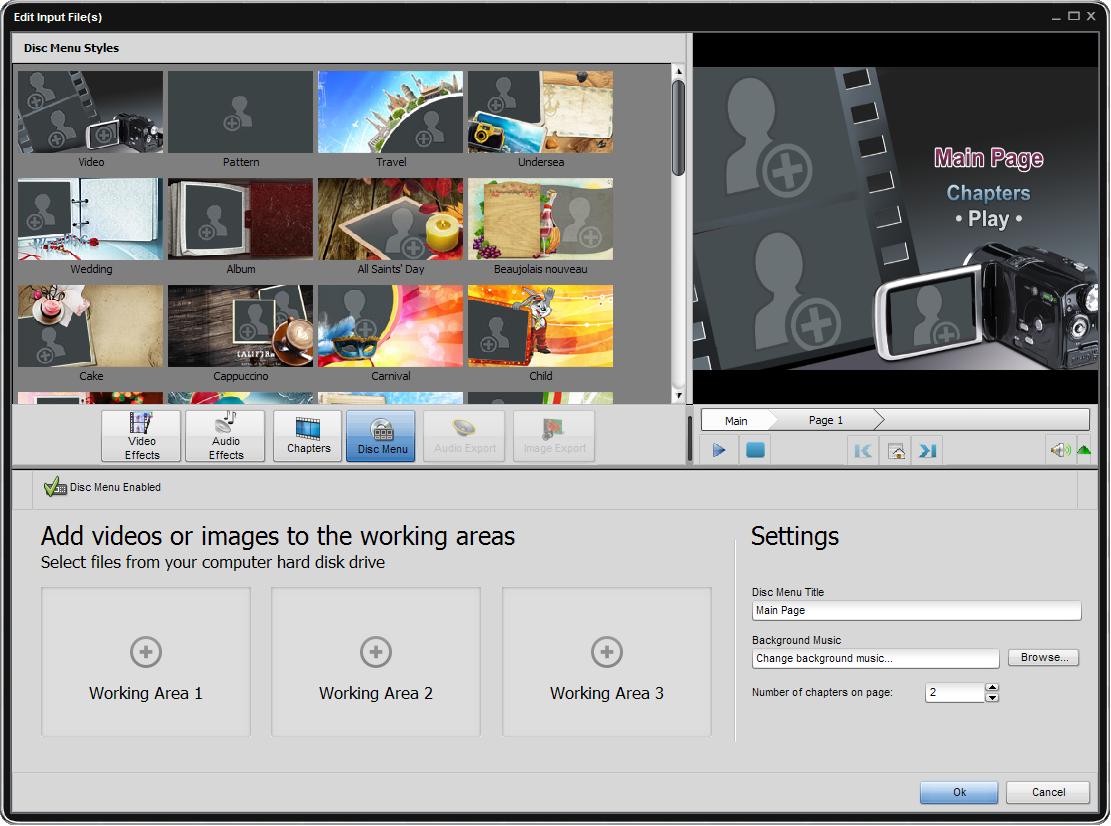
In the Settings section of the Edit Input File(s) window you can change the Disc Menu Title, assign your own Background Music or set the Number of chapters on page using the appropriate controls.
After you are through with making chapters, click the Ok button in the bottom right corner of the window to switch back to the conversion mode. Now your files are ready to be converted and burnt to a DVD.