
How to make a stylish DVD menu?
- Introduction
- Step 1: Download and install Soft4Boost DVD Creator
- Step 2: Run Soft4Boost DVD Creator and choose the wizard guide mode
- Step 3: Import video files
- Step 4: Specifying menu style and setting chapters
- Step 5: Setting DVD video parameters
- Step 6: Creating and burning DVD
When you burn a DVD disc for back-up or creation, you may need a DVD menu for your DVD movie navigation. Here introduces the simplest way to make DVD menu with Soft4Boost DVD Creator, which also offers the simplest way of creating DVD.
Step 1: Download and install Soft4Boost DVD Creator
Click here to download it. After the download is finished, run the S4BDVDCreator.exe file and follow the installation wizard instructions.
Step 2: Run Soft4Boost DVD Creator and choose the wizard guide mode
First of all run Soft4Boost DVD Creator. To do that find the corresponding program icon on your desktop and double-click it. If you unchecked the Create desktop icon box during the installation, you can run the program from the Start menu. Please follow Start > All Programs > Soft4Boost > DVD Creator.
After you launch the program, select Let the Wizard guide me (recommended) option and click the Next >> button.
This step is used to load the videos into your project. These videos will be used to create your DVD. Use the buttons in the bottom part of the window to Add or Remove the videos to/from your future DVD, or to quickly Clear the whole list of the videos. When you finish creating video files list, click the Next >> button or the << Back button to return to the previous step.
Step 4: Specifying menu style and setting chapters
This step will let you create chapters in your video and select a menu style:
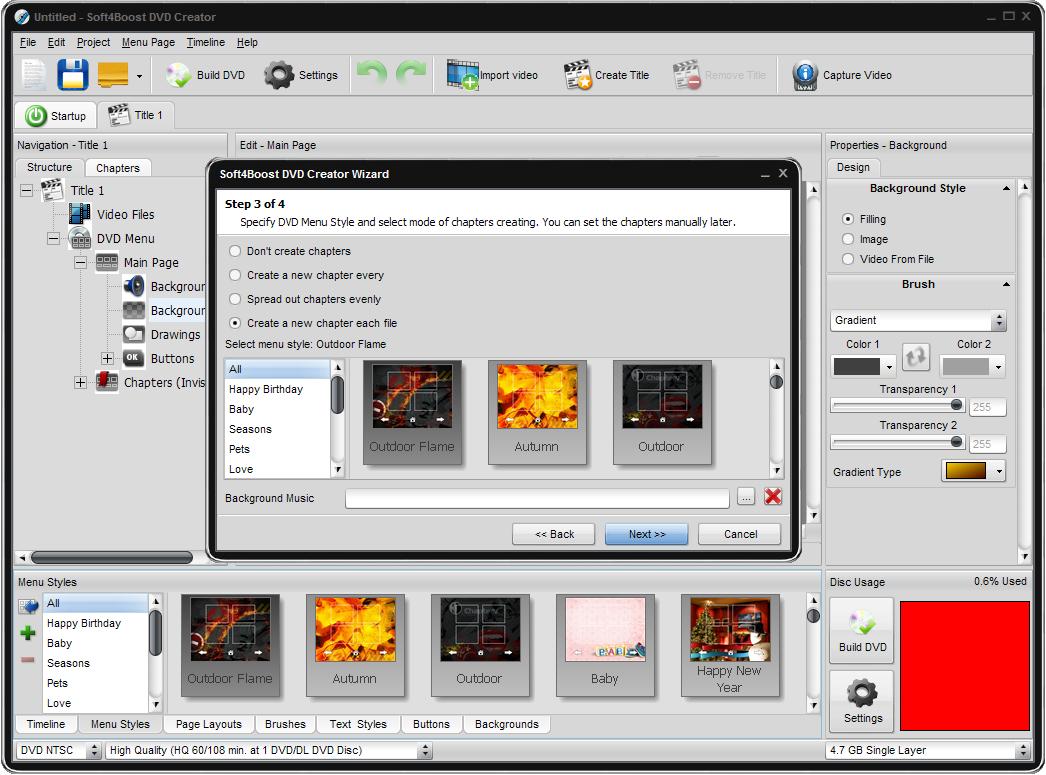
Select a menu style from the list of the available presets. If you wish you can add some audio as a background to your menu page. Use the Browse button to choose the necessary audio file or you will be able to do it later when editing the menu.
When you set all the chapters and choose the menu style click the Next >> button to go to the next step or use the << Back button to return to the previous step.
Step 5: Setting DVD video parameters
Before you start editing your DVD menu you should set the DVD parameters so that the created disc could be played correctly.
Click the Finish button to end the wizard and start the DVD menu editing, or use the << Back button to return to the previous steps and change some parameters. You can also use the Cancel button to discard all the changes and close the wizard.
Step 6: Creating and burning DVD
To start the DVD building process use the Build DVD button. After that change the project parameters: system, audio/video settings and control the space occupied by the video on the selected disc type and the Build DVD button.
Insert a blank DVD disc into your computer optical disc drive. Make sure that the disc is compatible with your drive. Easy Disc Burner application will be launched to guide you through the burning process. You can select the necessary disc drive if you have several, refresh it and mark the Verify disc check-box to make sure the disc is recorded correctly.
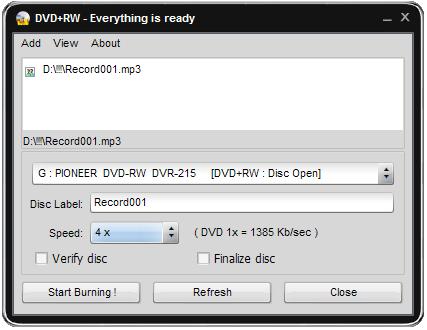
Now click the Start Burning! button to begin the recording. Note, that if the disc is not empty you will be offered to erase it. If you do not want to do that, you can eject the disc and use another one instead.
After the burning is over the disc will be ejected automatically. Note, if you checked the Verify disc, the recording will take a little longer depending on the size of the output files as the program will need time to verify them.