
How to make own disc covers?
- Introduction
- Step 1: Download and install Soft4Boost Disc Cover Studio
- Step 2: Run Disc Cover Studio and create the project with needed disc type
- Step 3: Edit your covers until you find an ideal look (optional)
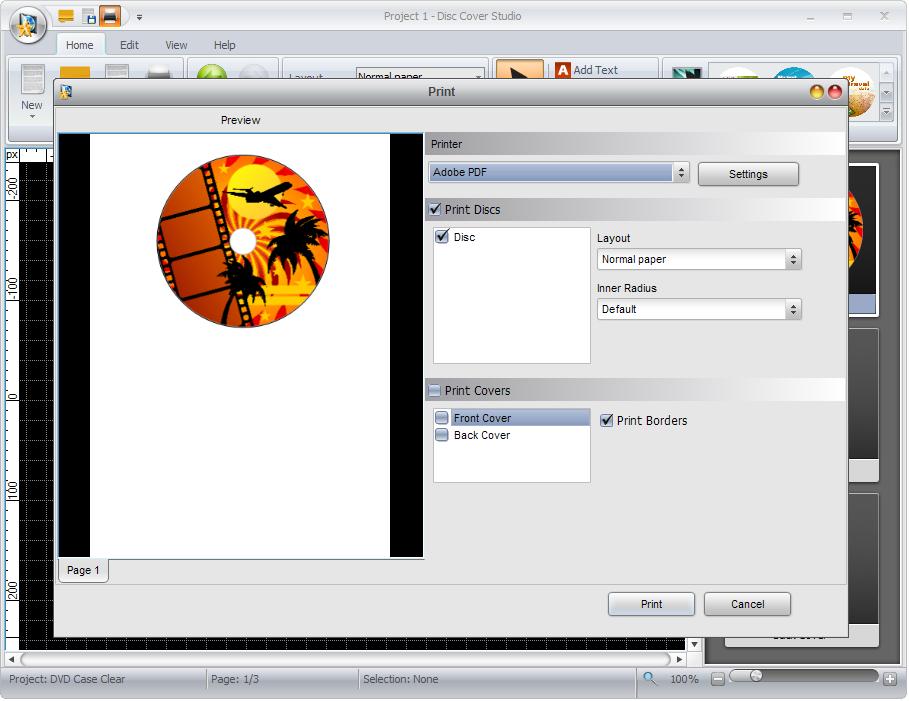
- Step 4: Print the disc covers
Making a customized disc cover is a good way to add some personality to a favorite collection of songs or video. You can easily achieve this result using Soft4Boost Disc Cover Studio. Besides you can adjust some additional settings to make the image look the way you want.
Step 1: Download and install Soft4Boost Disc Cover Studio
Click here to download it. After the download is finished, run the S4BDiscCoverStudio.exe file and follow the installation wizard instructions.
Step 2: Run Disc Cover Studio and create the project with needed disc type
First of all run Soft4Boost Disc Cover Studio. To do that find the corresponding program icon on your desktop and double-click it. If you unchecked the Create desktop icon box during the installation, you can run the program from the Start menu. Please follow Start > All Programs > Soft4Boost > Disc Cover Studio.
After the program was launched, click the New button in Main menu and choose needed disc case template. Also, you may choose preset template on Presets tab.

Step 3: Edit your covers until you find an ideal look (optional)
Create the background of your disc cover first. Browse through various images you have taken and saved on your computer. Try various font sizes, colors and patterns until you find an ideal look.
Once the covers have been completed, you will need to print them on heavy-duty disc cover paper. Click the Print button in Main menu and choose necessary settings for printing.
That's all! So easily you can make your own disc covers.